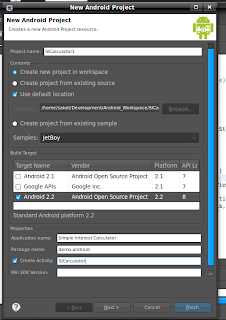
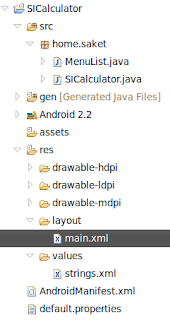
Hello everyone, this is my second article on Android Application Development. This time I will be introducing you to the command line utilities that comes packaged with the Android SDK. All these utilities are extensively used to create an Android Application. When using an IDE(Integrated Development Environment) like Eclipse, the developer never realises about the existense of these utilities because IDE's provide abstraction between developer and implementation of the process to create an application package. We all being an open source enthusiasts and Linux users, we should know how to build an application from command line, and to know exactly what is going on behind the scenes. I will be introducing you to some tools that comes along with Android SDK. This will give you a better understanding of the process involved in creating an android application. This knowledge will also help you in debugging the application.
These are the tools that are packaged with the Android SDK :
In this folder there are many tools available but we will be looking at the below tools, as they are used most often. The tools we will be dealing with are:
adb
android
ddms
emulator
mksdcard
sqlite3
traceview
We will be looking each tool in detail in the following sections.
Adb:
adb stands for “Android Debug Bridge”. Its main functionality is to manage the state of the emulator instance which is running or the android based phone which is connected to the system.
Adb is based on a client – server mechanism where in “client” is the Android Emulator instance or the Android device connected and “server” is your development machine. Server communicates with the client through a daemon process which runs in the background of your development system.
Issuing commands to the android instances using adb:
adb server is running on your development machine and now we need to attach this server to a client. Here we can have multiple clients, like 2 emulator instances running simulteneously, 1 USB device plugged along the instances, etc. Therefore we need to find the number of clients connected to development machine. This is done by running the following command,
$ adb devices
Now, when we know the number of clients, we can run a command directed specifically towards a particular client/instance. This can be done by running the following command:

$ adb -s
$ adb -s emulator-5554 shell
serial-number: The name of the device that you see after issuing
adb devices command under List of Devices column.
command can be any adb command like :
install <.apk file> : Installs an android application on the device
shell : presents you the adb client's console
logcat: displays all the log information on the system console
To see all the other commands that you can use with adb can be found here: http://goo.gl/pQ0s
Android:
This is a very important tool in terms of developing an android application. It lets you do 3 things:
To create and delete Android Virtual Deveices (AVD / emulators).
When a new AVD/emulator instance is created, “android” creates a dedicated folder for your AVD with a mapping to the system image, userdata image, sd-card image and some other files required by AVD.
Note: Each AVD does not contain a separate system image but it contains a mapping to it. Config.ini file maps the avd to system image based on the target of device(android-7(Eclair 2.1), android-8(Froyo 2.2)).
To create an AVD, there are some things we have to decide like the target of the device, this can be found by issuing this command:
$ android list targets
this shows the android targets supported by your development system.
Now once you have decided the target with which you want to create an AVD, we issue the following command to create an AVD:
$ android create avd -n myandy_2.2 -t 3
-n : Signifies the name of the AVD you want to specify.
-t : Signifies the “id” of the target with which the AVD needs to be created
Figure-4 Figure-5 Figure-6
Figure-4 shows you all the targets I have on my system and Figure-5 & 6 shows you the prompts that are asked when you create a new AVD for its hardware profile.
$ android list avd
Similarly if you want to delete an AVD then you can issue this command:
$ android delete avd -n myandy_2.2
To create and update android projects
Eclipse IDE creates a new Android Project in a very intuitive way but internally what it does is issue the following command:
$ android create project --target 3 \
--name HelloWorld \
--path ./Workspace/MyAndroidAppProject \
--activity HelloWorldActivity \
--package home.saket
Figure-7 Figure-8
Updating the android platform that you have on your development machine with the latest android releases, add-ons, etc. This can be done by launching the AVD Manager directly from the command line by issuing :
$ android
Figure-9
DDMS:
It stands for “Dalvik Debug Monitoring Service”. It is the debugger tool which is shipped along with the android SDK. It provides a way to debug our application running on the device remotely on our development machine. It can be launched from the command line by issuing the following command:
Note: It is assumed that you have the android tools directory set in your $PATH
$ ddms
Figure-10
This launches the debugger automatically attached to the running emulator instances.
In this debugger tool, you can view all the emulators attached as well as the processes running respective to the emulator instances on the left pane. On the right pane you can see some tabs for monitoring some emulator properties. We can see the “memory usage” of each of the applications running on the emulator, we can also see the CPU load, etc from the SysInfo tab. Similarly, we can also test an application by calling the emulator instance. It is done by entering the number in the “Incoming Number” field under Emulator Control tab.
Memory Usage Figure-11 Incoming Number Figure-12
In the same way we can also see the heap status of the device by causing Garbage collection of the device. It is done by following the below steps:
Select a process from the left pane
Under VM Heap, if it is written that “No Heap updates are available for this client” then we need to select Show Heap Updates button on top of left pane and then click the “Cause GC” button in VM Heap tab.
We will be able to see the heap update status showing the available memory in the device along with some extra information about the heap.
Emulator:
This tool is used to launch and control the emulator instance. An AVD created by the “Android” utility can be launched or stopped using the emulator utility. An AVD can be launched by issuing the follwing command:
$ emulator -avd
Ex: $ emulator -avd myandy_2.2
We can use emulator utility to control various hardware simulations of the emulator instance, like networking, media, etc. There are many options available to play around with the emulator utility. These options are also referred to as “startup options”.
General Syntax of using emulator utility:
emulator -avd
Example 1: When you run emulator instance by using
emulator -avd
OR
emulator @
you will not be able to see the logging information on the system terminal. Therefore, by starting the emulator instance with the startup option “-logcat” we will be able to see the initial logging that happens during the boot up of android OS.
Example 2: We can also open up a root shell on the emulator instance by using the foolwoing command:
emulator -avd
Example 3: This startup option disables the animation of the android logo during boot.
emulator -avd
Networking in Emulator:
When an emulator instance is powered up, it always runs behind a virtual router/firewall and hence isolated from the development environment. All the address spaces that are handled by emulator instances are in the range of “10.0.2.0 – 10.0.2.99”
Note: To access the developement machine's localhost, it is by default set to 10.0.2.2.
Once the emulator instance is running, we can connect to the instance using a simple telnet connection.
$ telnet localhost
Ex: $ telnet localhost 5554
Type help on the android console and you will be presented with some commands as shown in the below figure.
Figure-13
Similarly, there are plenty of options available for the emulator, you can find all the options at http://goo.gl/Mmqh
Mksdcard:
This tool lets you create an sdcard disk image which you can load it into the emulator. The file system created will be of the format FAT32.
To create and load an sdcard file into an emlator instance we issue the following commands:
$ mksdcard -l
Ex: $mksdcard -l S 512M saket.img
$emulator @myandy_2.2 -sdcard saket.img
Figure-14
Sqlite3:
This command is used to enter the sqlite database system. Using this command you can create, modify the databases present inside your emulator instance.
To enter into the database of your android device, you need to enter the following commands:
$ emulator @myandy_2.2 -shell
# sqlite3
sqlite3> .help
Generally when you have a database based android application, your application database is stored in “/data/data/
 You can perform DDL, DML statements in exactly the same way as in SQL.
sqlite3> create table employee(
emp_id int,
emp_name varchar(20)
);
sqlite3> .tables
employee
Traceview:
This tool is used to profile the application. To be able to use this utility, there are some requirements that your application should have. The application code has to have “Debug.startTracingMethod(String tracename)” method call at the beginning and “Debug.stopTracingMethod()” call at the end of the method to stop tracing. This method stores the tracing information onto an SDCard and hence your emulator instance should have an SDCard attached. The tracing methods writes a file at “/sdcard/
.trace” and hence we need to give permissions to ou application to be able to write a file on SDCard. The permission is given in “AndroidManifest” as“
android.permission.WRITE_EXTERNAL_STORAGE” />” When application is run on the emulator, we need to pull the trace file from the emulator instance and feed it to “traceview” utility. This is done in the following way:
$ adb pull /sdcard/HelloWorld.trace /tmp
$ traceview /tmp/HelloWorld.trace
Now, you will be presented with a traceview window as shown in Figure-16 below,

This GUI traceview is divided into 2 sections:
Timeline Section
Profile Section
Timeline Section shows you the execution time of each Thread in corresponding rows.
Profile Section shows you all the time that is spent by CPU inside a method with some statistics included in separate columns.
Some other tools that are used internally are
dx: This is used to convert a .class file to .dex file.
Monkey: This tool is used for stress testing of an android application. It issues random events on the application like touch, gesture, click events to test an android application.
Lets run monkey on email application which comes packaged when we create a new emulator instance,
$ emulator @andy_2.2
$ adb shell monkey -p com.android.email -v 500
Monkey is actually a android device console tool, it is passed the application package name(com.android.email) and number of tests(500) that it has to test for application.
I hope you would have liked the article and this knowledge share would be helpful in your quest with Android. I will be back with some other interesting information on Android Application Development in the coming editions.Furthermore, we will discuss building advanced application on Android and for Android.


